Are you looking for ways to improve your site ranking? If yes, then All In One SEO (AIOSEO) is the answer to your question. This one seo plugin is not only useful for SEO experts but also for beginners who want to rank their websites faster.
Search engine optimization (SEO) is crucial for enhancing your WordPress site’s visibility and traffic.
All-in-one SEO for WordPress is a free plugin that makes sure every part of your site is optimized and ready for the eyes of Google. The plugin has features like page speed optimization, image optimization, sitemap generation, auto post scheduler, spam detection, and many more.
This plugin helps you optimize your blog for both mobile and desktop devices.
It takes care of all the technical SEO stuff so that you can focus on writing content.
With All in One SEO, you can control which pages are indexed by search engines and avoid duplicate content issues. It also adds social Meta tags to your site so that it looks great when shared on Facebook, Twitter, Pinterest, and other social media platforms.
In this article, we’ll show you how to install and set up All in One SEO for WordPress, plus explain why it’s one of the best SEO plugins for WordPress
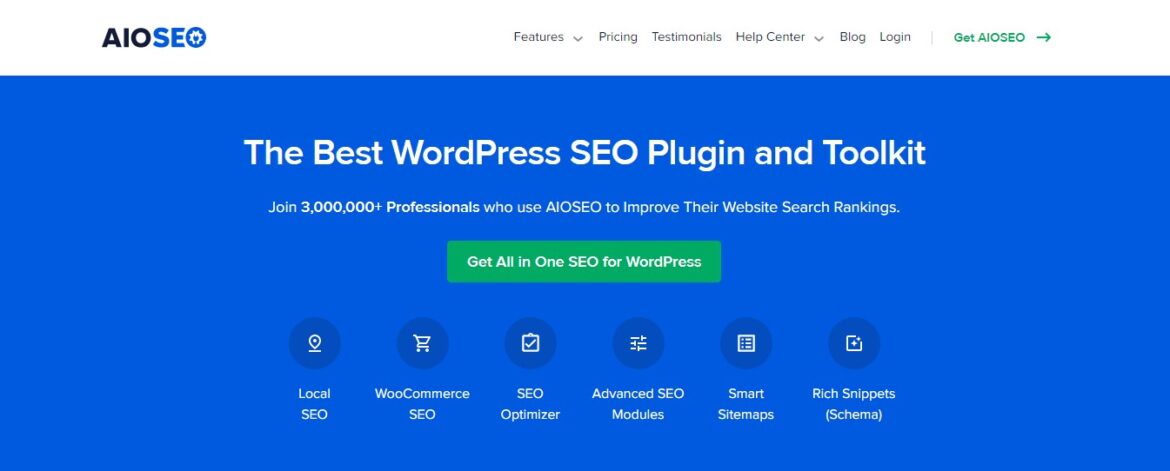
All in One SEO is a popular WordPress SEO plugin that allows you to quickly optimize your site for all sorts of things like titles, Meta tags, social media platforms, and more.
It is a complete SEO solution for WordPress suitable for both newbies and experts. This makes it easy to use and compatible with other plugins.
The plugin also provides advanced options for fine-tuning your site so that it looks as good as possible on search engines.
It is an all-in-one solution that allows beginners to easily optimize their sites without having to learn how each feature works.
Disclaimer: Note that some links and banners in this article are affiliate links, which provide us with a small commission if you complete purchases via those links. You can read the affiliate disclosure of our privacy policy in the footer.
Introduction to All in One SEO
All in One SEO (AIOSEO) is a powerful WordPress plugin designed to help website owners optimize their website for search engines and improve their search engine rankings. With over two million installs and a 4.7-star rating, AIOSEO is one of the most popular SEO plugins for WordPress. This plugin is packed with features that cater to both beginners and seasoned SEO experts, making it an essential tool for anyone looking to enhance their website’s visibility on search engines.
In this article, we will explore the key features of AIOSEO and provide a step-by-step guide on how to set it up correctly. Whether you’re new to SEO or looking to refine your existing strategy, AIOSEO offers a comprehensive solution to help you achieve your goals.
Why Use All in One SEO for Search Engine Optimization?
There are various reasons why you should use All in One SEO for WordPress. While this plugin might not be as popular as Yoast SEO, it is one of the best plugins out there to optimize your WordPress websites for search engines.
Here are some of the reasons why you’ll want to use this plugin on your site:
It’s free and packed with features. The best thing about All in One SEO is that it is free and has a lot of useful features. Unlike Yoast SEO, you don’t have to pay a dime if you want to install this plugin on your website.
It’s easy to set up and configure. Unlike other SEO plugins available in the market, All in One SEO doesn’t come with an extensive settings page.
The settings page is very simple yet effective for most users who don’t want too many options when configuring their sites’ SEO settings.
It’s easy to use and you don’t need to be an SEO expert to implement or fix SEO basics on your website.
It helps you create more search engine-friendly content by giving your TruSEO score for your posts. Alright, let’s have a look at how you can easily set up AIOSEO on your WordPress website.
Key Features of All in One SEO
AIOSEO offers a range of features to help website owners improve their search engine rankings and drive more traffic to their website. Some of the key features of AIOSEO include:
SEO Audit: AIOSEO’s SEO audit feature scans your website and provides a score out of 100, indicating your website’s SEO health. The feature also provides an actionable checklist of improvements to help you optimize your website. This ensures that you can identify and fix any issues that might be hindering your search engine performance.
On-Page SEO: AIOSEO’s on-page SEO feature allows you to optimize your pages and posts for search engines. You can edit your SEO settings on a page-by-page basis, including your meta title, meta description, and keywords. This granular control helps you ensure that each piece of content is perfectly optimized for search engines.
XML Sitemap: AIOSEO creates a custom XML sitemap for your website and submits it to search engines, helping them to crawl and index your content more efficiently. This is crucial for ensuring that all your pages are discovered and ranked by search engines.
Local SEO: AIOSEO’s local SEO feature helps you optimize your website for local search by adding structured data to your website and creating a custom landing page for each of your business locations. This is particularly beneficial for businesses that rely on local customers, as it helps improve visibility in local search results.
Social Media Integration: AIOSEO allows you to integrate your social media accounts with your website, helping you to control how your thumbnails look on social media and drive more traffic to your website. This feature ensures that your content looks great when shared on platforms like Facebook, Twitter, and Pinterest, encouraging more clicks and engagement.
Installing and Setting Up All in One SEO Pack Plugin
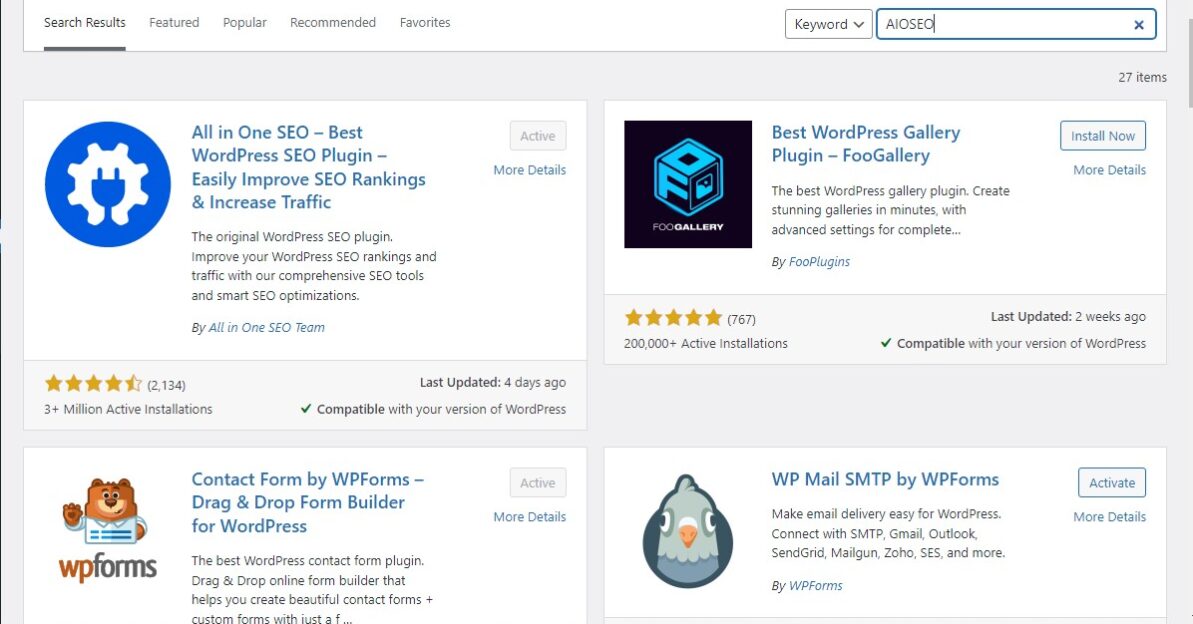
To start setting up the All in One SEO Pack for WordPress, you’ll need to install and activate the AIOSEO for WordPress plugin first.
Here are the steps in short;
Install All in One SEO
Activate the Plugin
Connect All in One SEO to Search Console
Set the Default Homepage Title and Meta Description
Set Site Title, Description, and Keywords
Configure the Social Media Settings
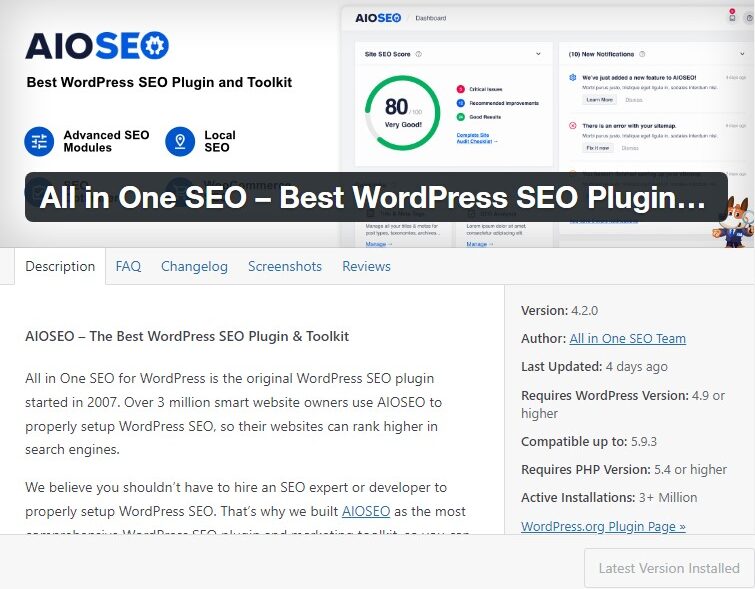
You can do this by going to the Plugins section of the WordPress admin panel and clicking on Add New. Next, search for “All in One SEO Pack” (no quotes) in the search box. Click on Install Now, and then Activate.
Once activated, the setup wizard is launched and you will need to click the “Let’s Get Started” button.
The next step is to answer a few questions about your website. For example, category or type of website like a blog, a news website, an online store, a small business website, etc.
You will then need to add some page descriptions to help search engines and people understand your page. The first thing to add is your SEO title and Meta description.
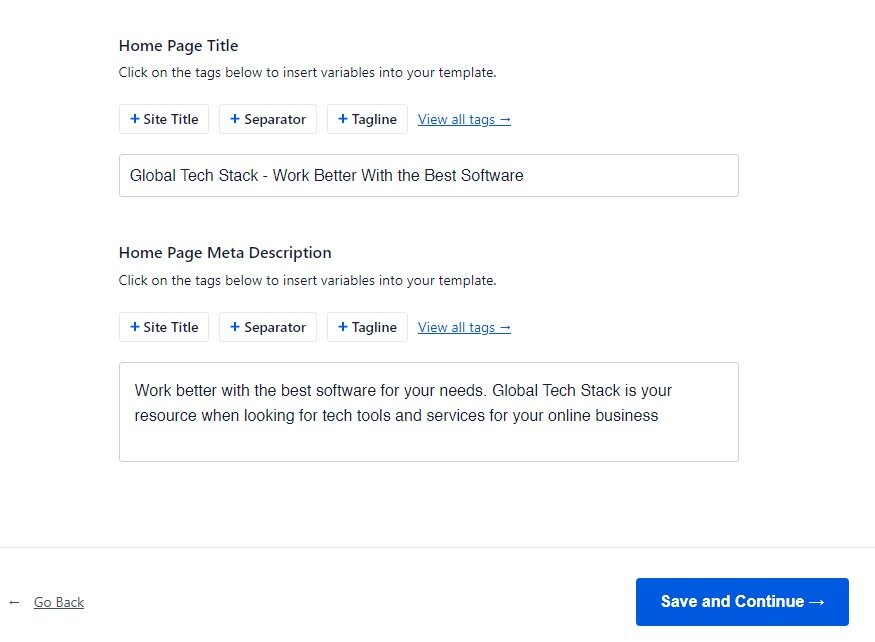
These are used by search engines to identify and match search queries with your website pages. So, when optimizing your wens use keywords you want to rank for include the keywords in both the title and Meta description.
You can always come back to edit this information, so don’t be too hung up on writing the perfect title or Meta description.
The next step is to choose between setting up as an organization or a person. To differentiate this, think about the difference between a personal blog and a company blog.
If you are a business you can go ahead and add your organization’s name and phone number. If you don’t have your company phone number yet, you can leave it blank.
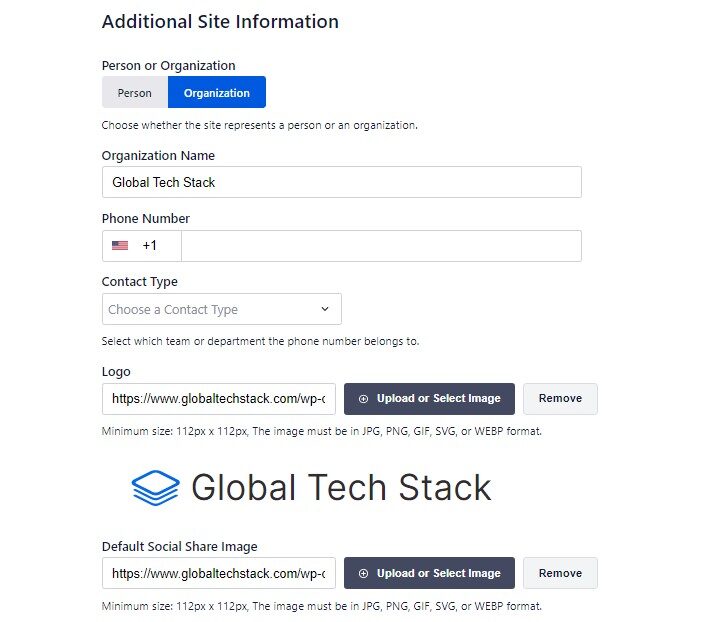
The next part still on the same page is to add your company logo and a default social media sharing image for your website. In case you don’t have a featured image set for your page the default sharing image will appear when you share that page on your social pages.
The next step is to choose SEO options, there is a bunch of them some are free, and others in pro. If you have a pro subscription or are planning to upgrade to pro, you will have options like Image SEO to pick from.
The essential SEO features like XML Sitemaps and Optimized Search Appearance are on by default. You can choose other features you want to turn on depending on what you would like to use the plugin for.
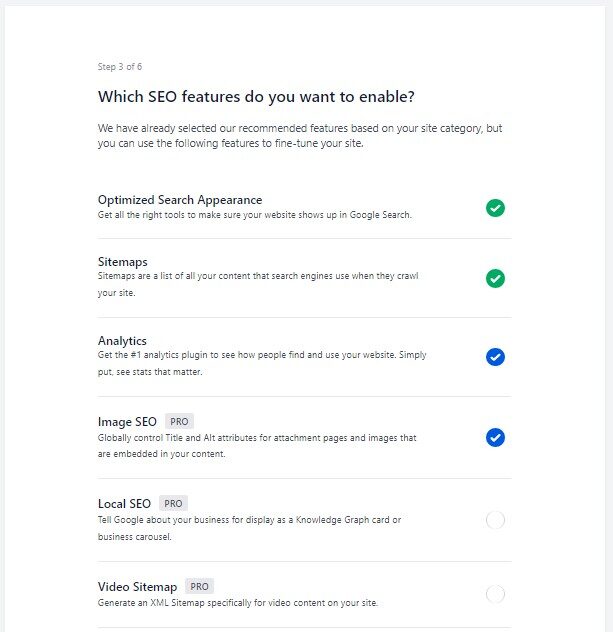
If you are new to WordPress, you can use the default options and continue to the next step. On the Search Appearance screen, the plugin will show you a preview of how your site will appear in the search results.
You can click on this preview to change your homepage title and Meta description. By default, the plugin uses your main keywords in the site’s title and description. To change them later, go to plugin settings. The first option is whether your site is live or under construction.
If you don’t want search engines to list your website right now, then choose Under Construction. The next option is whether to include all post types (e.g., posts, pages, products) in search results. If you are unsure about this, then keep it turned on for all post types.
There is also an option to choose to have a single author or a multi-author blog. If you are a single author, you need to select the option of a single author to avoid duplicate content on your blog.
If you are on pro you will also be asked to enter your license key so you get access to your pro features. After entering and connecting your license key, you can then click the finish setup, save and exit popup.
That’s it, you have successfully installed and set up All in One SEO for WordPress. Let now go into how you can make use of its incredible features, and start ranking your website on search engines.
Optimizing Your Website Pages and Blog Posts for SEO using AIOSEO
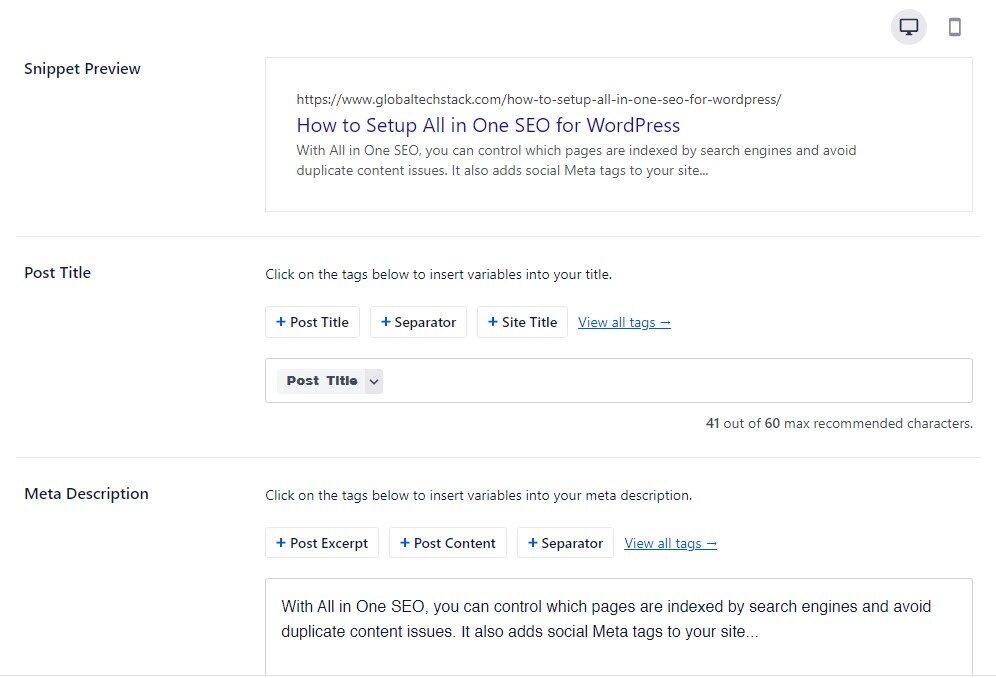
All In One SEO Pack shows the TruSEO score for each of your blog posts and pages, with practical tips on how to raise that score and make your content more effective in search.
To get there you simply open the page you want to edit in your WordPress dashboard and scroll down and click on the All in One SEO Meta box.
Fill in the fields:
SEO Meta Title – This is the title that appears at the top of your browser when you visit a page or post. By default, this is generated by WordPress. It’s always best to create a custom title that includes the keyword you are targeting.
Meta Description – This is the description that appears in search engines under your page or post title within the search results. Some search engines may use portions of this description, so make sure it accurately explains what your content is about.
For example, if someone searches for “SEO training”, my description would say something like;
“Get free SEO training now with our step-by-step lessons and videos.”
If your website has already been indexed by Google, then Google may already have information from other pages on your site which will be used to generate a snippet for this page as well.
The snippet preview will show you how your page may appear in Google search results as well as give you feedback on how to improve it with tips and recommendations for updating different parts of your content such as headers, image alt text, and links, etc.
Focus Keyphrase – This is where you add a keyword you want to optimize your page for. Adding a focus keyword or Keyphrase doesn’t improve your SEO, but it helps you optimize your content for that focus keyword.
A focus keyword is the main keyword that you want to target. This is usually the phrase that your users are most likely to search for to find the information in your article. You can add multiple keyphrases when on AIOSEO pro.
You also have the social tab to create different variations of title and description when sharing content on different social platforms. Choosing a default image for social sharing as mentioned before, helps ensure your links always appear with an image in case there is one missing for a specific page.
Content Analyzer for TruSEO Score
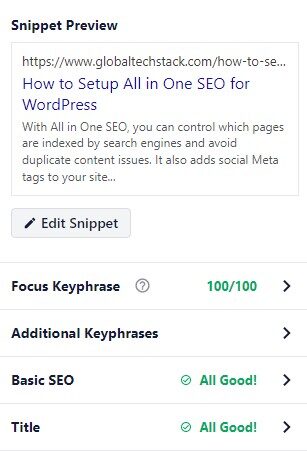
The content analyzer enables you to see how well your content is optimized. It also has a TruSEO score. This is a feature that helps you to optimize your content and it uses an algorithm that searches for keywords in various locations on the page. It calculates their length and density, and assigns the right values according to their location.
Readability Score
Keyword Density
Focus Keyword Usage
The higher this score (out of 100), the better optimized your post or page is for search engines like Google, Bing, DuckDuckGo, and Yandex.
The TruSEO score gives you a clear checklist for SEO so you can publish your posts being sure that they have a high chance of performing. If what’s being checked doesn’t work there will be recommendations for you to work on to make your content better.
Advanced SEO Features
AIOSEO also offers a range of advanced SEO features to help you take your SEO to the next level. These features include:
Rich Snippets Schema: AIOSEO’s rich snippets schema feature allows you to add rich snippets to your content, including star ratings, prices, and more. Rich snippets enhance your search results by providing additional information that can attract more clicks and improve your click-through rate.
Redirects: AIOSEO’s redirects feature helps you to find and fix 404 errors on your website, redirecting users and search engines to your new content. This is essential for maintaining a good user experience and ensuring that your site’s SEO is not negatively impacted by broken links.
SEO Analysis: AIOSEO’s SEO analysis feature provides an in-depth analysis of your website’s SEO, including your website’s structure, content, and links. This comprehensive analysis helps you understand where your site stands and what improvements can be made to enhance your search engine rankings.
By leveraging these advanced features, you can ensure that your website is fully optimized for search engines, giving you the best chance of achieving higher rankings and driving more traffic to your site.
Optimizing WooCommerce SEO
All in One SEO comes packed and ready with features to help you optimize your WooCommerce store. Here is what you can do with All in One SEO to optimize your WooCommerce store.
Optimize for eCommerce-specific keywords. Your users will be searching for your products in a specific way, and you need to anticipate what that may be.
Optimize your product pages. To optimize your individual product pages, you’ll need to focus on a few different things:
Add relevant keyword-rich content to the top of the page. Don’t add too many keywords; instead, try to include them naturally in any text or images. A professional copywriter can help you with this.
Write effective Meta descriptions for each page. Again, it’s best not to overdo it and stuff keywords into these fields. Instead, write natural descriptions that inform or entice visitors and also happen to include a few keywords as well. Again, this is something a professional copywriter can help you with!
Make sure your alt tags are optimized with keywords as well!
Optimize your product category pages. If a user is looking for an iron skillet but they don’t know the name of one yet, they might start by browsing the cookware section of your site.
It’s important to optimize these category pages so that they appear higher in Google search results than those of other websites that are doing the same thing. This is another great opportunity for professional content writers who specialize in SEO and/or e-commerce sites like yours!
Optimize your product tags. To further optimize your website’s SEO capabilities for categories or types of products offered at one time (i.e., if there are multiple sizes), use tags rather than categories.
When possible, try using both so customers can find exactly what they’re looking for without having too many options presented on screen all at once. A good rule of thumb would be 10 products max per page.”
XML sitemaps
Sitemaps are files that you add to your site so that search engines can find content on it. A sitemap is a list of pages and other content on your site which may include things like media, images, and videos.
In All in One SEO Pack, the XML sitemap feature helps search engines like Google and Bing discover the URLs on your site. Couldn’t we just wait for them to do this by themselves? Yes, but sitemaps help speed up the process by telling search engines about all of your pages in one place. Additionally, an RSS sitemap is distinct from a standard XML sitemap, as it includes only the latest content, which helps search engines like Google quickly discover and display new posts in search results.
It’s important to note that XML sitemaps do not influence how well or poorly your pages rank in search results. They simply help search engines know that they exist on your site. Here is how you can find your sitemap, enter sitemap.xml at the end of your site domain, eg. https://example.com/sitemap.xml
Schema Markups and Meta Descriptions
Schema markups are also important to allow Google to better understand your content. This way, they have a better chance of displaying your content in rich snippets which can be very useful.
Rich results can include anything from recipes to products and even reviews. Schema markup is also important for voice search so it is vital for a good SEO strategy that you implement schema on your website if you haven’t already.
Schema & Structured Data lets you enable schema markups.
Google Search Console Integration
Google search console is free and helps website owners monitor their website presence in google search results.
When you’ve added your website to Google Search Console, you’ll be able to view information about how Google ‘sees’ your site. This can help you identify issues with your website and make improvements.
Below are some of the things that you can do with Google Search Console:
Receive alerts when Google encounters crawling errors.
Submit sitemaps and individual URLs for crawling.
View detailed reports about how your pages appear in search results (e.g., click-through rate, position in search results, etc.).
See what keywords people are using to find your site in search results (i.e., which keywords are bringing traffic to your site).
You should make sure that these settings match what is set up on All in One SEO or other SEO plugins that you may have installed on your site:
All in one SEO makes it easy to connect your website to Google Search Console. The first thing you need to do is to add your site to GSC and verify that you own your website using an HTML tag.
When you get the HTML tag copy it and go to your WordPress Admin area.
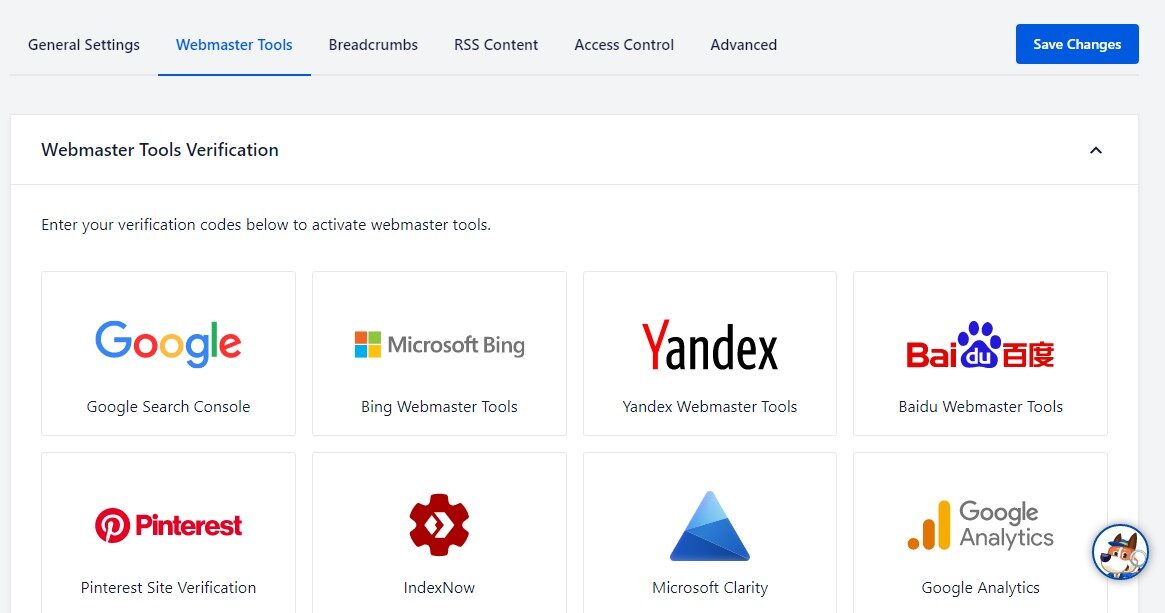
Now, go to the All in One SEO general settings page and g to the webmaster tools tab. There you can click on the Google Search Console and enter your verification code. There are more options to add verification codes for, like Bing, Yandex, and Baidu.
This is an option you would usually add by going to the theme editor, and inserting it between the header tags of your WordPress theme.
Local SEO Setup and Tools
When you run a business, your customers must know where to find you and how to contact you. This can mean local search optimization for your website so that it shows up in search results for your city or town. It can also mean keeping your business information up to date, like changes in hours or phone numbers.
With All in One SEO, you can easily create a local business SEO schema markup. The All in One SEO Local Business Schema Markup feature allows you to easily add schema markup to your site using the same metadata that you use with All in One SEO.
This helps search engines like Google understand what kind of business you have and where it is located. This information is then displayed in their search results.
The first thing you need to do to get started with Local Business Schema Markup is to create a Google My Business account. This allows you to add your business listing. Also helps you prove that you own the business. Additionally, you can manage your business information using Google’s My Business dashboard.
This helps you get even more enhanced placement and keep the information up to date for your business.
Once you have created the Google My Business account, simply go into the All in One SEO > Local SEO page on your WordPress site. Then, enter the name of your business in the Local Business Name field. You can also enter an alternate name if necessary (i.e., if the name on your website differs from the one listed in Google My Business).
Next, copy over any additional details such as opening hours, contact etc. Make sure you save the changes you make.
Find what you need to grow better


